We are a young couple remodeling our first house...one outdated / ugly thing at a time. This blog documents our remodel projects and ideas.
RSS

2.28.2011

Spring Fever?

I am so glad that it is getting to be spring time! We have lovely daffodils springing up everywhere. They are an instant smile maker. And a sign that it is time for me to get the house decorated for spring. I don't change much up for spring, just a few simple changes and a spring-inspired mantel are it. I tried to keep the decor centered around natural elements with splashes of orange and green.

I am a simple girl and love a clean dining room table. I don't keep it set and ready for guests but I do like a small centerpiece. This was easy to make with items already on-hand. I added some twine to a vase and then popped in some yellow and orange tulips. Then I placed the vase on some burlap scraps.

The mantel features some more DIY-twine projects and on-hand items. I picked up two brass candle sticks, on sale for $1 each, from the thrift store and wrapped them in twine. The large antique copper-looking dog was a major happy moment find - he was only $16. The lantern was purchased at Halloween and used to balance the height of the dog. I spray painted the $2 thrift store mirror orange and leaned it up on the mantel to help reflect light.


I also want to add some bright colored pillows on the couch to make it fun. And besides for the pillows, the house is decorated for spring. Like I said, I don't do much. I just like a change from the winter colors and some brighter colors. What have you done to brighten your house for spring?

2.27.2011

Foyer No More

I thought it was about time that I showed y'all the foyer. We have been hard at work getting it into tip-top shape. (When I say we, read it as I.) Anyhoo let me jog your memory and show you a picture of the foyer on move-in day:

Bland and boring are the first two words that come to mind. You can also add yuck and formal to the list. And if you know me, none of those words describe me, so why should they describe my house? Um, they shouldn't! So tearing out the built-ins, ridding the house of gold, laying hardwoods and refinishing to a darker color were immediate needs. Yes needs. And since this is the front door foyer and the first impression of the house, that makes remodeling this space number one on my list.

I'm not going to go into the details of remodeling this space. I've already posted about the projects individually, so you can go here and pick which project you want to know more about. Are you ready for the after picture yet? Are you scrolling down and skipping ahead of me? Shame. Just kidding. Drum roll please........

Bam! Isn't it wonderful? I am drooling over my own hardwood floors. Totally different look in the house now. It feels much more relaxed, comfortable, and fun now - words that describe me and the hubby. The slim entry table opens up the space and the gallery wall gives the house a not-so-formal vibe. And we added a little pop of color in the used-to-be bland foyer. The large corn plant is supposed to make positive energy and a fresh room, at least according to a google search on feng shui.

It just get better. No more gold chandelier or large fireplace hearth. No more fake marble surround or carpet. And doesn't the light look nice filtering in through the sidelights? Can you believe they had mini blinds on them? Yuck. I love this area of the house now.

Take a look back at the before picture and you'll easily notice how large those built-ins were. And you'll also notice the totally different look we now have. I don't think it is a "foyer" anymore. That word is too fancy-shmancy. Now it is an entry. Just a simple, welcoming entry.

2.24.2011

Bedding In The House

Once again, Wal-Mart has proved me wrong. I am going to have to retract my statement about them not making me think of home decor. First it was the sheets that I made into curtains, now it is a comforter set. Yep, I bought a comforter set for the guest bedroom from Wal-Mart. Here it is:

Isn't it great! I love the green color with cream and brown accents - reminds me of the apple green color swatch I loved. It is perfect for the room. And the best part is that the comforter set was only $68 for a queen size. Woot!

And those two cute pillows, I made those using the trusted no-sew method. Go me. It is hard to see, but there is some cream detail stitching. You can kind of see it in the second picture. Anyways, I'm making kicking booty and making progress in the guest bedroom!

Please excuse the messy bed. I just threw the bedding down and snapped some pics. Didn't even take the time to make the bed properly. Shame on me.

2.22.2011

Stool Makeover

I didn't need this stool at all. I have no place to put it. But when I was making a trip through a local flea market, it caught my eye. And it was priced at only $6. Hello stool, nice to meet you. You are coming home with me.

The lines on this little stool are so cute. However, the hard as wood seat is not comfortable at all. No worries, I gave this stool a quick little makeover to make it uber-chic. First I cut out a piece of 1" foam for the seat to make it comfortable to sit on. After all, it is a stool and should be comfy.

Then I used a piece of scrap fabric to cover the foam. Just use a stapler to fasten the fabric to the bottom of the seat. Trim the excess fabric away.

This stool is much cuter already, but still not complete. I spray painted the legs a rich emerald green for that extra something-something. Dad, I know you hate green, but give this a chance.

And look at this stool now.


Want to know how much this mini makeover cost? $6. Just the price of the stool. I already had the foam, fabric, and spray paint. Now I just need to find a place for this little stool. Anybody need a stool?

2.21.2011

Guest Bedroom Reveal

I am super excited to show the after pictures of the guest bedroom that I was hired to redecorate. So excited that I am not going to share a lot and just show the pictures! Let's start.

Before: The original paneling and short window coverings.
After: The bed was moved to the window wall and the entire wall was draped in sheet-curtains for a dramatic effect. Still need to get two matching lamps for the side tables. And there is the burlap M that was supposed to be a pillow which is now framed and hung on the wall.

Before: Original paneling and closet doors.
After: The closet doors were painted the same color as the wall to blend them in. The knobs were spray painted chocolate brown, and so was the mirror frame.

Before: A handy built-in desk.
After: The desk area was painted the same color as the wall. Also, the dresser was moved from the closet wall to this wall by the desk, which is at the foot of the bed. Still need to get a better chair for the desk, and excuse the paint cans and supplies.

Before: Short window coverings made the windows appear smaller than they really are.
After: This window got the same sheet-curtains as the wall behind the bed. The curtain rod was mounted at the ceiling to make the window appear larger. And you can see that the bed was moved from beside the window to the adjacent wall.

And one more of the curtain wall, new bedding and ceiling fan.

I love the transformation of this room! Between the paint color and the draped wall behind the bed, the original paneling disappears. The room feels much larger with the new furniture placement and it is so warm and inviting with the rich chocolate brown curtains, caramel paint, and a splash of dark red in the bedding.

And of course it was a thrifty make over. The most expensive aspect of this project was the paint - but it was so worth it! Total room project costs was $200, Woo hoo!!!

Psst - Here is the original room, here is phase 1, and this is the post about the burlap m and the love pillow.

2.17.2011

Pendant x 4

I finally finished out the header in the kitchen. Does that sound like greek? Well, if you are just joining let me catch you up. (Oh, and hi and welcome!) We used to have cabinets that hung from a header and seperated the kitchen from the dining room. We tore those out and were left with an unfinished header that needed finishing:

Okay, you are caught up. And I finally finished the header with lots of drywall mud, sanding, and painting. So now I could turn it over to my hubby, the electrician, to install the pendant lights. See that wire hanging from the header above? That was the power to the vent-a-hood and he reused it for the pendant lights.

How did he install the pendants? I have no clue. I'm not an electrician, I just hand him the tools. But I know he measured for the three pendant lights over the bar (the fourth is over the sink) and then drilled holes in the header for the wire to come down through. Next he went up in the attic to do his electrical magic and made three wires come out of the ceiling instead of the one. Then he wired up the pendants and they worked. Go hubby!


Can you hear me singing with joy? I love, love, love the new pendant lights. And the kitchen is much more open now with the cabinets above the bar gone. I don't even miss the storage. I loved my kitchen before, but now it feels so much more inviting! And just for fun, here is a picture of old with the in-the-way cabinets.

Psst - Wanna get up to date on the kitchen remodel? Here is the post about the counter tops, here we removed the cabinets, and here we changed out the gold hardware to brushed nickel.

2.15.2011

Beefing Up The Foyer

My lonely table in the foyer is sad and looks tiny in the now open foyer:

There is a definite need for some artwork or photos, and pronto. I have been keeping my eye open for something that caught it. No artwork ever jumped in my hands, but a giant red S screamed "take me home" when I saw it. And the clearance price of $5 made it all the sweeter. I was so excited to hang the S above the table when I got home.

The S, although large and in charge, isn't cutting it. I like it and want to keep it, but, all by itself it looks lonely. I think I should surround the S with some little art friends to create an asymmetrical wall arrangement. However, I have champagne tastes on a beer budget, and don't want to pay out the wazoo for the art. Frames straight from the store might be all neat and pretty, which I want neat and pretty, but they can also be expensive when purchased in number. The best solution, once again, is to purchase frames from a thrift store.

I used the same process on these frames as I did in the Man Cave - separate the mats, frames, and artwork. Spray paint the frames gloss white so they look like expensive store-bought frames instead of cheap thrift store frames.

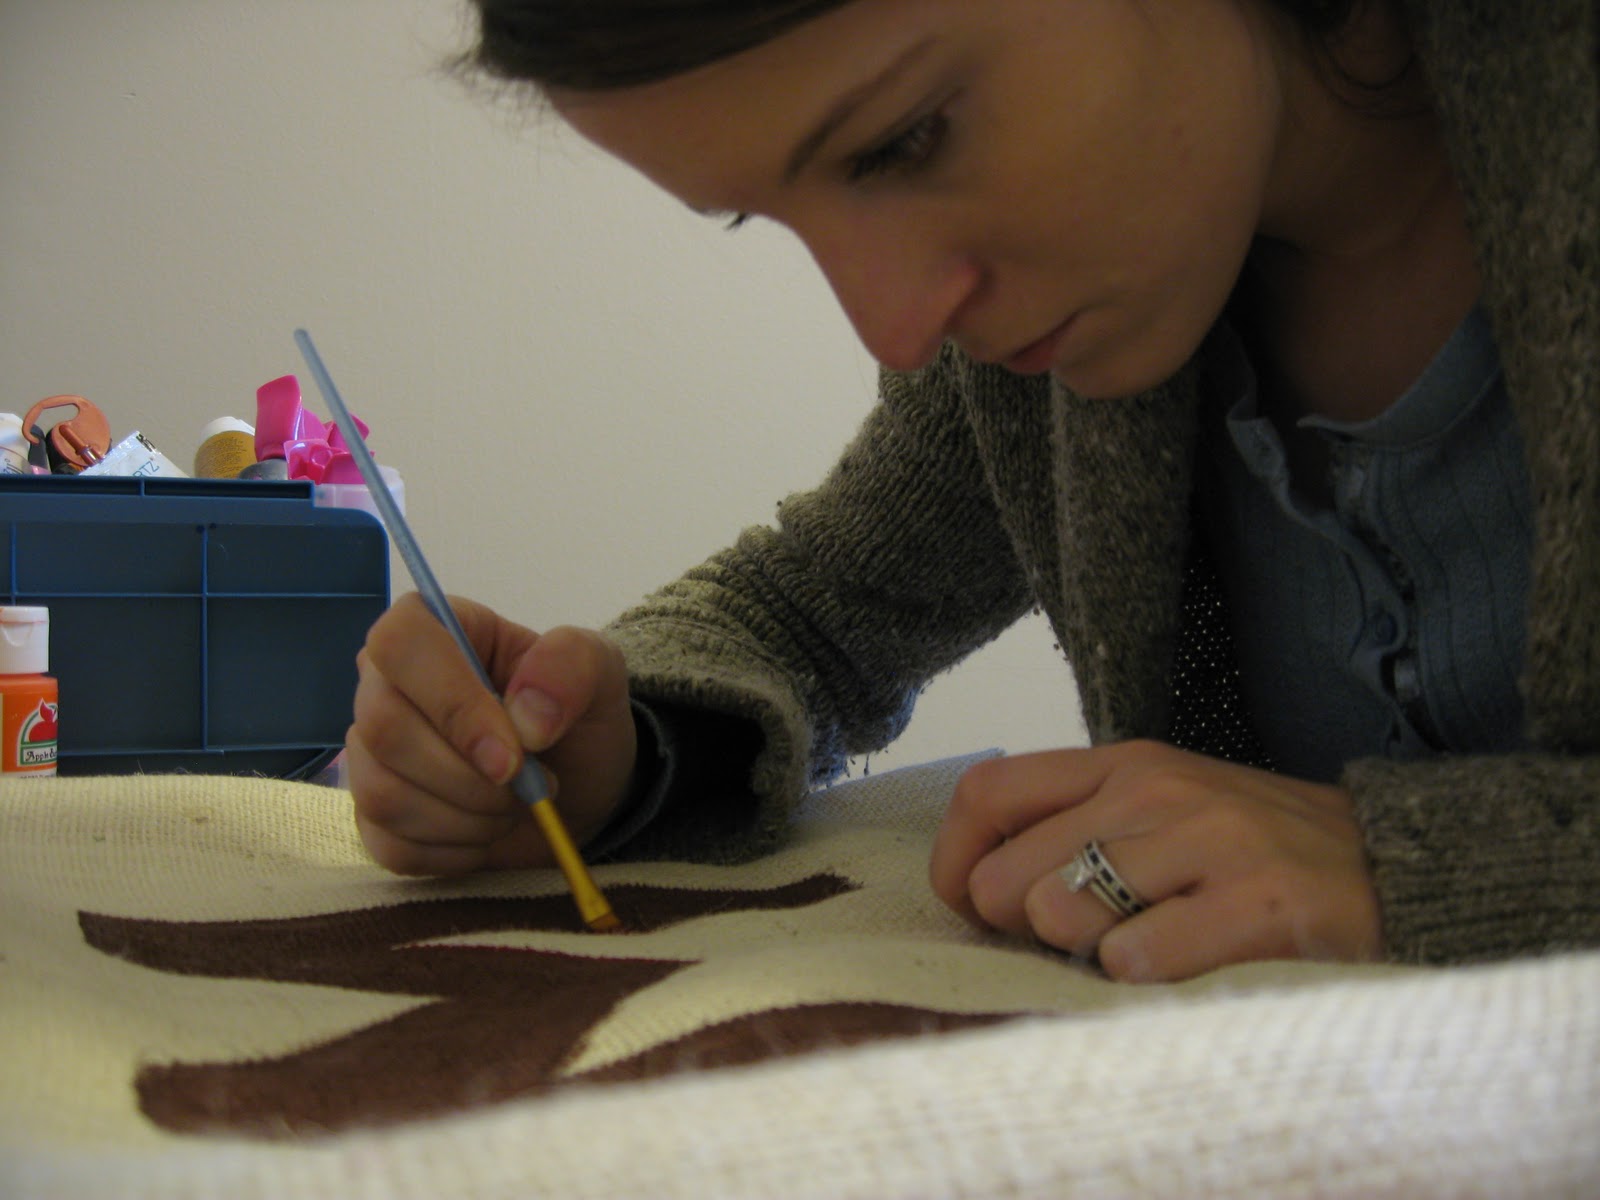
Instead of using paper on the mats, I used fabric - burlap and brown/white polka dots. To make the fabric tight on the mats, fold the fabric over onto the back of the mat, hot glue into place and then snip away the excess.

The artwork for this arrangement was almost free, I only purchased one item from an Etsy shop. The other art is a picture of me and the hubby, a picture of a waterfall from a cabin we visited on our 5th anniversary, a note from our wedding, silhouettes of the girls, a feather from our bird, and keys from our apartment and house.

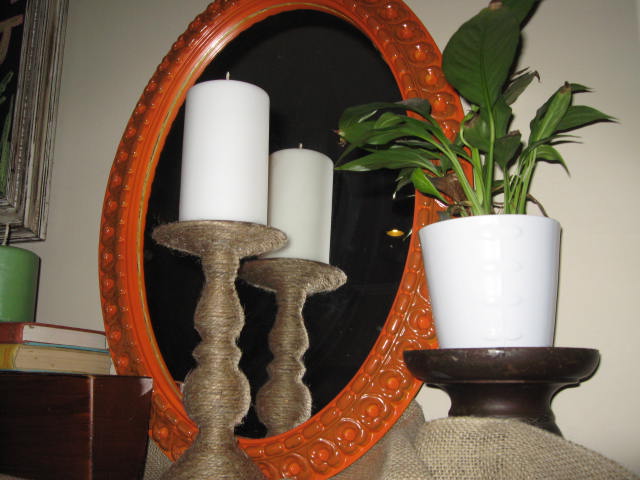
And here is what the foyer table is looking like nowadays, actually this is the picture from the fall decoration post, but close enough to nowadays:

The table and wall in the foyer look much better now. And the living area of the house is starting to come together. Do you see those baseboards in the picture above? Yep, got those suckers installed which was the last step in the refinishing project.

Psst - I used a fall picture of the wall because the table sits empty now waiting on spring decorations. And I hung the arrangement in the fall - slap my on the wrist for just now posting it.

Phase 1 - Guest Bedroom

Well, I didn't get the guest bedroom finished this weekend. I secretly had hoped I would, but knew that it would be near impossible to be 100%. So that is why this is phase 1 and not the final reveal. But before I show the pics, let me remind you of what the space looked like Friday:


The plan was to make over the room as thriftily as possible and keep the design simple. The paneling was primed and then painted Warm Buff and the trim was painted Snow Dust - both Valspar colors. Painting the room took an entire day, even with the help of my sweet mom. Bare paneling is not easy to paint, but we succeeded.

Next up was addressing furniture arrangement. All of the furniture in the room stayed - the bed, two side tables, and a tall dresser. I thought a better arrangement would be to turn the bed onto the far wall, which is exactly what we did. And there is plenty of room for a table on each side. The dresser was moved to the wall opposite the foot of the bed. Much better. However, the headboard on the bed is not tall enough or beefy enough for my taste. So what is a thrifty girl to do? Drape the entire wall behind the bed in sheet-curtains. Ta da, instant glamour and a focal point for the bed. I used dowel rods and cup hooks to hang the sheet-curtains to save money instead of curtain rods.
The duvet is just laid on the bed. And that bulge is a bag of decor items.
And then we replaced the light fixture with a ceiling fan. Not we, actually my dad installed it with help from us. But the fan motor was womper-jawed when we got it installed and so the fan wobbled when turned on. Boo! The fan will have to be taken down and exchanged, another day. Here is the old fixture, straight out of 1970:

I snapped the pictures with my phone on the way out the door, so I'm sorry about the poor quality. But hopefully this will give you an idea of what we accomplished. I still need to hang some art, make the bed, and stage the room. And then I will have the final, final pictures.

2.10.2011

My Weekend Project

This weekend, I am redecorating this:


It is my first job I was hired for - a guest bedroom that has not been touched. Yes, a virgin bedroom! I am ready to start working on it now. And, of course, this project is on a budget. No work crews or fancy fabric here, just me DIYing this guest bedroom. Cross your fingers that all goes well for me. I will post the after pictures and the decor how-to's next week. Until then, enjoy your weekend and have fun DIYing some projects too!

2.09.2011

Love Pillow

This is a timely post with Valentine's Day right around the corner. I made a pillow last night and put the word "love" on it. I'm sure a ton of people have done this before, it is nothing new. But this pillow isn't for me, it is for a room I am decorating. And the pillow came about because of my DIY fails so I thought I would share the story.

You see, I have a sewing machine but still prefer to make pillows the no-sew method because I don't know how to use the sewing maching. The plan was to make one of the cool-kid burlap pillows. (Why is burlap popular for pillows? It is itchy. But it is the cool-kid-thing to do.) I had three sides done and decided to paint a "M" on the burlap to personalize it.


After the "M" dried, it was stuffing time. This is where burlap and no-sew create a fail. Every time I stuck more stuffing in the pillow, the seam would rip open a bit. Uh-oh! The easy thing to do would be to open my still-in-the-box sewing machine and sew a seam for the pillow. I don't take the easy way, I take the hard headed way. And that pillow made me mad so I ripped it apart Hulk Hogan style...and it felt good.

I still need throw pillows for the room, and I am working on a budget so buying new is out. And burlap is out. (I don't care if it is cool or not.) But I am bringing muslin back. Was muslin ever in? Who cares. It is replacing the burlap pillow and will still offer some visual texture without all the scratchiness. Round two of no-sew pillow making went much better than round one. It was actually a breeze. And when the little muslin pillow was ready for stuffing, it looked a little sparce. Then I remembered I had picked up a rub-on transfer sticker on sale for $1. I have never used one of these little stickers but it was so easy.


This little love pillow is done just in time. And the burlap with the "M" painted on it is going to be framed and hung in the room. I couldn't throw it away, that is too wasteful.
Do you have any DIY fails to share? Or pillow making headaches? Have you ever used a rub-on transfer sticker?

2.08.2011

Global Warming

This past week, we had some really warm temps. Like 70 degrees, dig out the short-sleeves warm temps. So of course I had to take full advantage of the nice weather and spray paint a few items I had stored up. 


After spray painting, we went to the river to look for drift wood for a project idea I have in my head - which we found none. But it was nice to walk along the rocks and soak up the sun.

Or if you're Paris, enjoy the wind in your hair because the windows were rolled down. 

And then, the snow hit. We had snow over the weekend and more coming this week. Not just more, a ton more. Reports say 7+ inches! That is going to shut down the state. I won't be able to spray paint, but I should have plenty of time to get some projects done around the house.

This is probably the most random post - from 70 degrees to 7 inches of snow. All I have to say is welcome to Arkansas weather.

2.06.2011

Ready For Spring

Don't get me wrong, I love snow...but I am ready for spring. In my anticipation and dreaming for spring, I started working on ideas and projects for a spring mantel-scape. The mantel has been bare since the Christmas decorations were removed - I don't decorate for V-day. And this bare mantel has been bare for too long now.

First up on project-decorate-mantel-for-spring is chalkboard books. However, black chalkboard does not say spring to me, it is more halloween. I want bright and fun, not dark and scary. So I made bright blue chalkboard paint which screams spring. (DIY chalkboard paint is for sale in my Etsy shop!)

After making the chalkboard paint, I painted the backs of a stack of books. And I only painted the back of the books so I could still use them around the house without showing the chalkboard paint on the back.


A few coats of chalkboard paint later and the books were ready to be chalked, or drawn on with a piece of chalk. 

Yay! It works and they look super cute. But laying the books flat on the mantel are not the way to go. We need to show off these DIY chalkboard books by hanging them. I put two gorilla hooks into the wall and then strung a colorful ribbon between the two hooks. Then hang the books on the ribbon.

First project on decorating mantel for spring was a success, and super easy to do. And I can write whatever message suits my fancy on the books. I can also change the paint color to burnt orange for fall, or pink for V-day, if I ever decide to decorate for V-day.