I took the super easy way out of making art for the sun room. In other words, I didn't make anything. I failed with the stacked mirrors and I'm just too busy to make paint-chip art...although I will conquer this one day...so I used what I had on hand and hung a free window. Sounds so exciting, right?! Well, it might not be exciting, but it fills the space.
Now I know you are probably thinking - a plain window? This is not just a plain window though. I repurposed it into a frame with a little jute twine, and our goofy mustache photos.
And since this is a very old window and has seen better days, I caulked around the window frame to make sure the glass wouldn't fall out in the middle of the night. I also dry-brushed some of the blue paint onto the frame to tie it in with the built-ins. Instead of cleaning up the glass and removing all the old paint, I left it because I think it adds character.
Isn't that better?! It is perfect for the sun room. Adds a little family fun to the room for free! Yep, all supplies were on hand so this was a zero dinero project...which makes it all the better. And I still have a boat-load of free windows to do something with. One great idea I saw was from a fellow Arkansan, Cara at Living the Home Life. Check out her dining room wall:
Something close to this might be making an appearance in my house in the very near future.
7.05.2011
7.04.2011
Knockoff Mod Podge Recipe
Yes folks, I am sharing a knockoff mod podge (aka decoupage medium) recipe. And this knockoff stuff works amazingly well, just like the real stuff. But....this knockoff recipe is better because it will save you some bucks. So, let's get this knockoff started.
You will need some white all-purpose glue, a mason jar with a lid (or any larger container with a lid), and some water. No pics to share because you won't need them. And this is what you do:
Here is a dining table that I used the knockoff recipe on. This table was free from the tornado house and had a laminate top that was chipped. I roughly patched the chipped side and roughed up the top a little by sanding it.
Then I used the knockoff recipe to add old dictionary pages to the top. I also painted the legs a fun blue with leftover miss-matched paint.
Not too bad for a free table, free dictionary, free leftover paint, and knockoff mod podge. Total costs was about 50 cents....yep, 50 cents! Just paid for the glue. This recipe makes me so happy - who doesn't love a DIY recipe for super cheap?!
Happy 4th y'all!!
You will need some white all-purpose glue, a mason jar with a lid (or any larger container with a lid), and some water. No pics to share because you won't need them. And this is what you do:
- Empty the glue into the mason jar
- Fill the glue bottle with water
- Shake the glue bottle
- Empty the watery-glue into the mason jar
- Shake the jar, with the lid on
Here is a dining table that I used the knockoff recipe on. This table was free from the tornado house and had a laminate top that was chipped. I roughly patched the chipped side and roughed up the top a little by sanding it.
Then I used the knockoff recipe to add old dictionary pages to the top. I also painted the legs a fun blue with leftover miss-matched paint.
Not too bad for a free table, free dictionary, free leftover paint, and knockoff mod podge. Total costs was about 50 cents....yep, 50 cents! Just paid for the glue. This recipe makes me so happy - who doesn't love a DIY recipe for super cheap?!
Happy 4th y'all!!
Labels:
DIY,
mod podge project,
Remodel this house
7.01.2011
June Recap
June went too fast! Half the year = gone. Now it is extra hot around these parts and I am so not motivated to work. I really wanted to totally redo the flower beds, but not in this heat. They will just have to wait until this fall. Anyways, onto the June recap.
Hung new blinds in the casa:
Made some art for the master:
And then made some new curtains for the master:
Finished with a week long t-shirt remodel fest:
I am just going to live on red bull and vitamin b for the next few months while life is so busy. (Confession - I still have spring mantel decor. I am already thinking about fall. If I skip summer, is that bad?) I am just going to keep all DIY projects inside where there is plenty of ac!
6.30.2011
Tied Up Sides
Round 4 - tied up sides. This is the most risque t-shirt remodel this week and the final product will show some skin...unless you wear a cami. Make sure the shirt is not fitted because tying up the sides will make it fitted. And I am using a long sleeve shirt that I picked up for $1 thinking that it was short sleeve.
Step 1 - Lay the shirt out flat. If you want, cut the sleeves and the neck. I cut off both the neck and the long sleeves.
Step 2 - Cut in perpendicular about an inch along the side seam. Too technical? Just cut towards the center of the shirt from the side. Make the cuts about half inch to an inch wide. Like so:
Step 3 - Cut off every other strip. You could leave every strip, but it gets hard to tie every single one. I found it easier to tie every other one.
Step 4 - Then separate the front and back of the shirt by cutting the strips along the seam.
Step 5 - Tie the two corresponding side strips together.
Step 6 - Stretch out the sides of the shirt by tugging on it. Be careful to not pull too hard and rip the shirt.
Step 7 - Wear it!
Yes, I am crooked. Blogger hates me today and will not upload the pictures correctly. So, everyone just turn your head to the side. And you can see the skin I mentioned earlier. However, if you put a cami on or even a long sleeve shirt in the winter, this shirt will have a G rating instead of PG-13.
Next week = regularly scheduled DIY projects.
Braided T-shirt Scarf
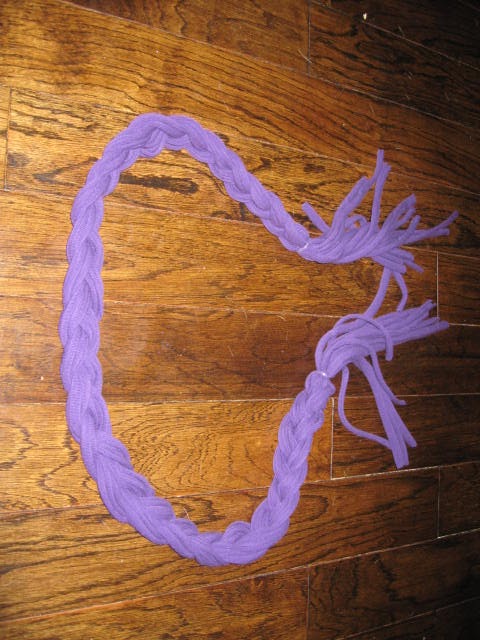
Round three of t-shirt remodeling - braided scarf. Another easy, all season scarf tutorial. The instructions are similar to the circle-scarf, except the circles in this scarf are cut and then braided. And, I finally graduated to a cutting mat and rotary cutter. Go me!
Step 1 - Lay the shirt out flat and cut the bottom hem off. Then cut straight across the shirt right under the arm pits.
Step 2 - Cut the shirt into 1 inch strips
Step 3 - Stretch the strips. Leave one strip to the side and don't stretch it.
Step 4 - Then cut the strips so the circles are broken.
Step 5 - Leave about 6 inches of fringe and then begin braiding. I used a clear pony-tail holder to secure all the strips together. And then I put the strips under the edge of a table to hold in place while I braided.
Step 6 - Braid the strips. Leave about 6 inches of fringe at the end.
Step 7 - Secure the two ends together with the extra strip from step 3.
Step 8 - Wear it! - No pics. I had been working outside with no makeup and I'm not about to take a pic to put on the internet looking like that! But maybe I'll take a few pics tonight and update.
And - I almost lost a finger to the rotary cutter. That thing is sharp! My finger was nothing to it. So....maybe I haven't graduated yet.